Starlight Kit Breakdown – Drilling Patterns, Fiber Routing & Installation Types
Installing a fiber optic starlight headliner can transform your vehicle's interior into a stunning starry sky. This guide will provide you with a comprehensive breakdown of the installation process, including drilling patterns, fiber routing, and the different types of starlight kits available. Follow these steps to ensure a professional and safe installation.
Basic Installation Process Overview
To begin, follow these steps for a successful starlight kit installation:
- Lay the headliner on a clean, flat surface and vacuum the back foam to remove any debris.
- Plan your drill pattern before making any holes. Aim for a random yet evenly distributed pattern to create a natural starry effect.
- Mark your drill spots using chalk, a pencil, or pin pokes, depending on the material of the liner.
- Use a drill bit sized between **1.0mm to 1.5mm** or a hot needle to poke holes for the fiber optics.
- Insert each fiber from the rear and glue it into place, ensuring it is flush with the surface of the headliner.
- Utilize a clear-drying adhesive such as hot glue, clear epoxy, or silicone to secure the fibers in place.
- Route all fiber tails neatly toward the bundle location or projector to maintain a clean appearance.
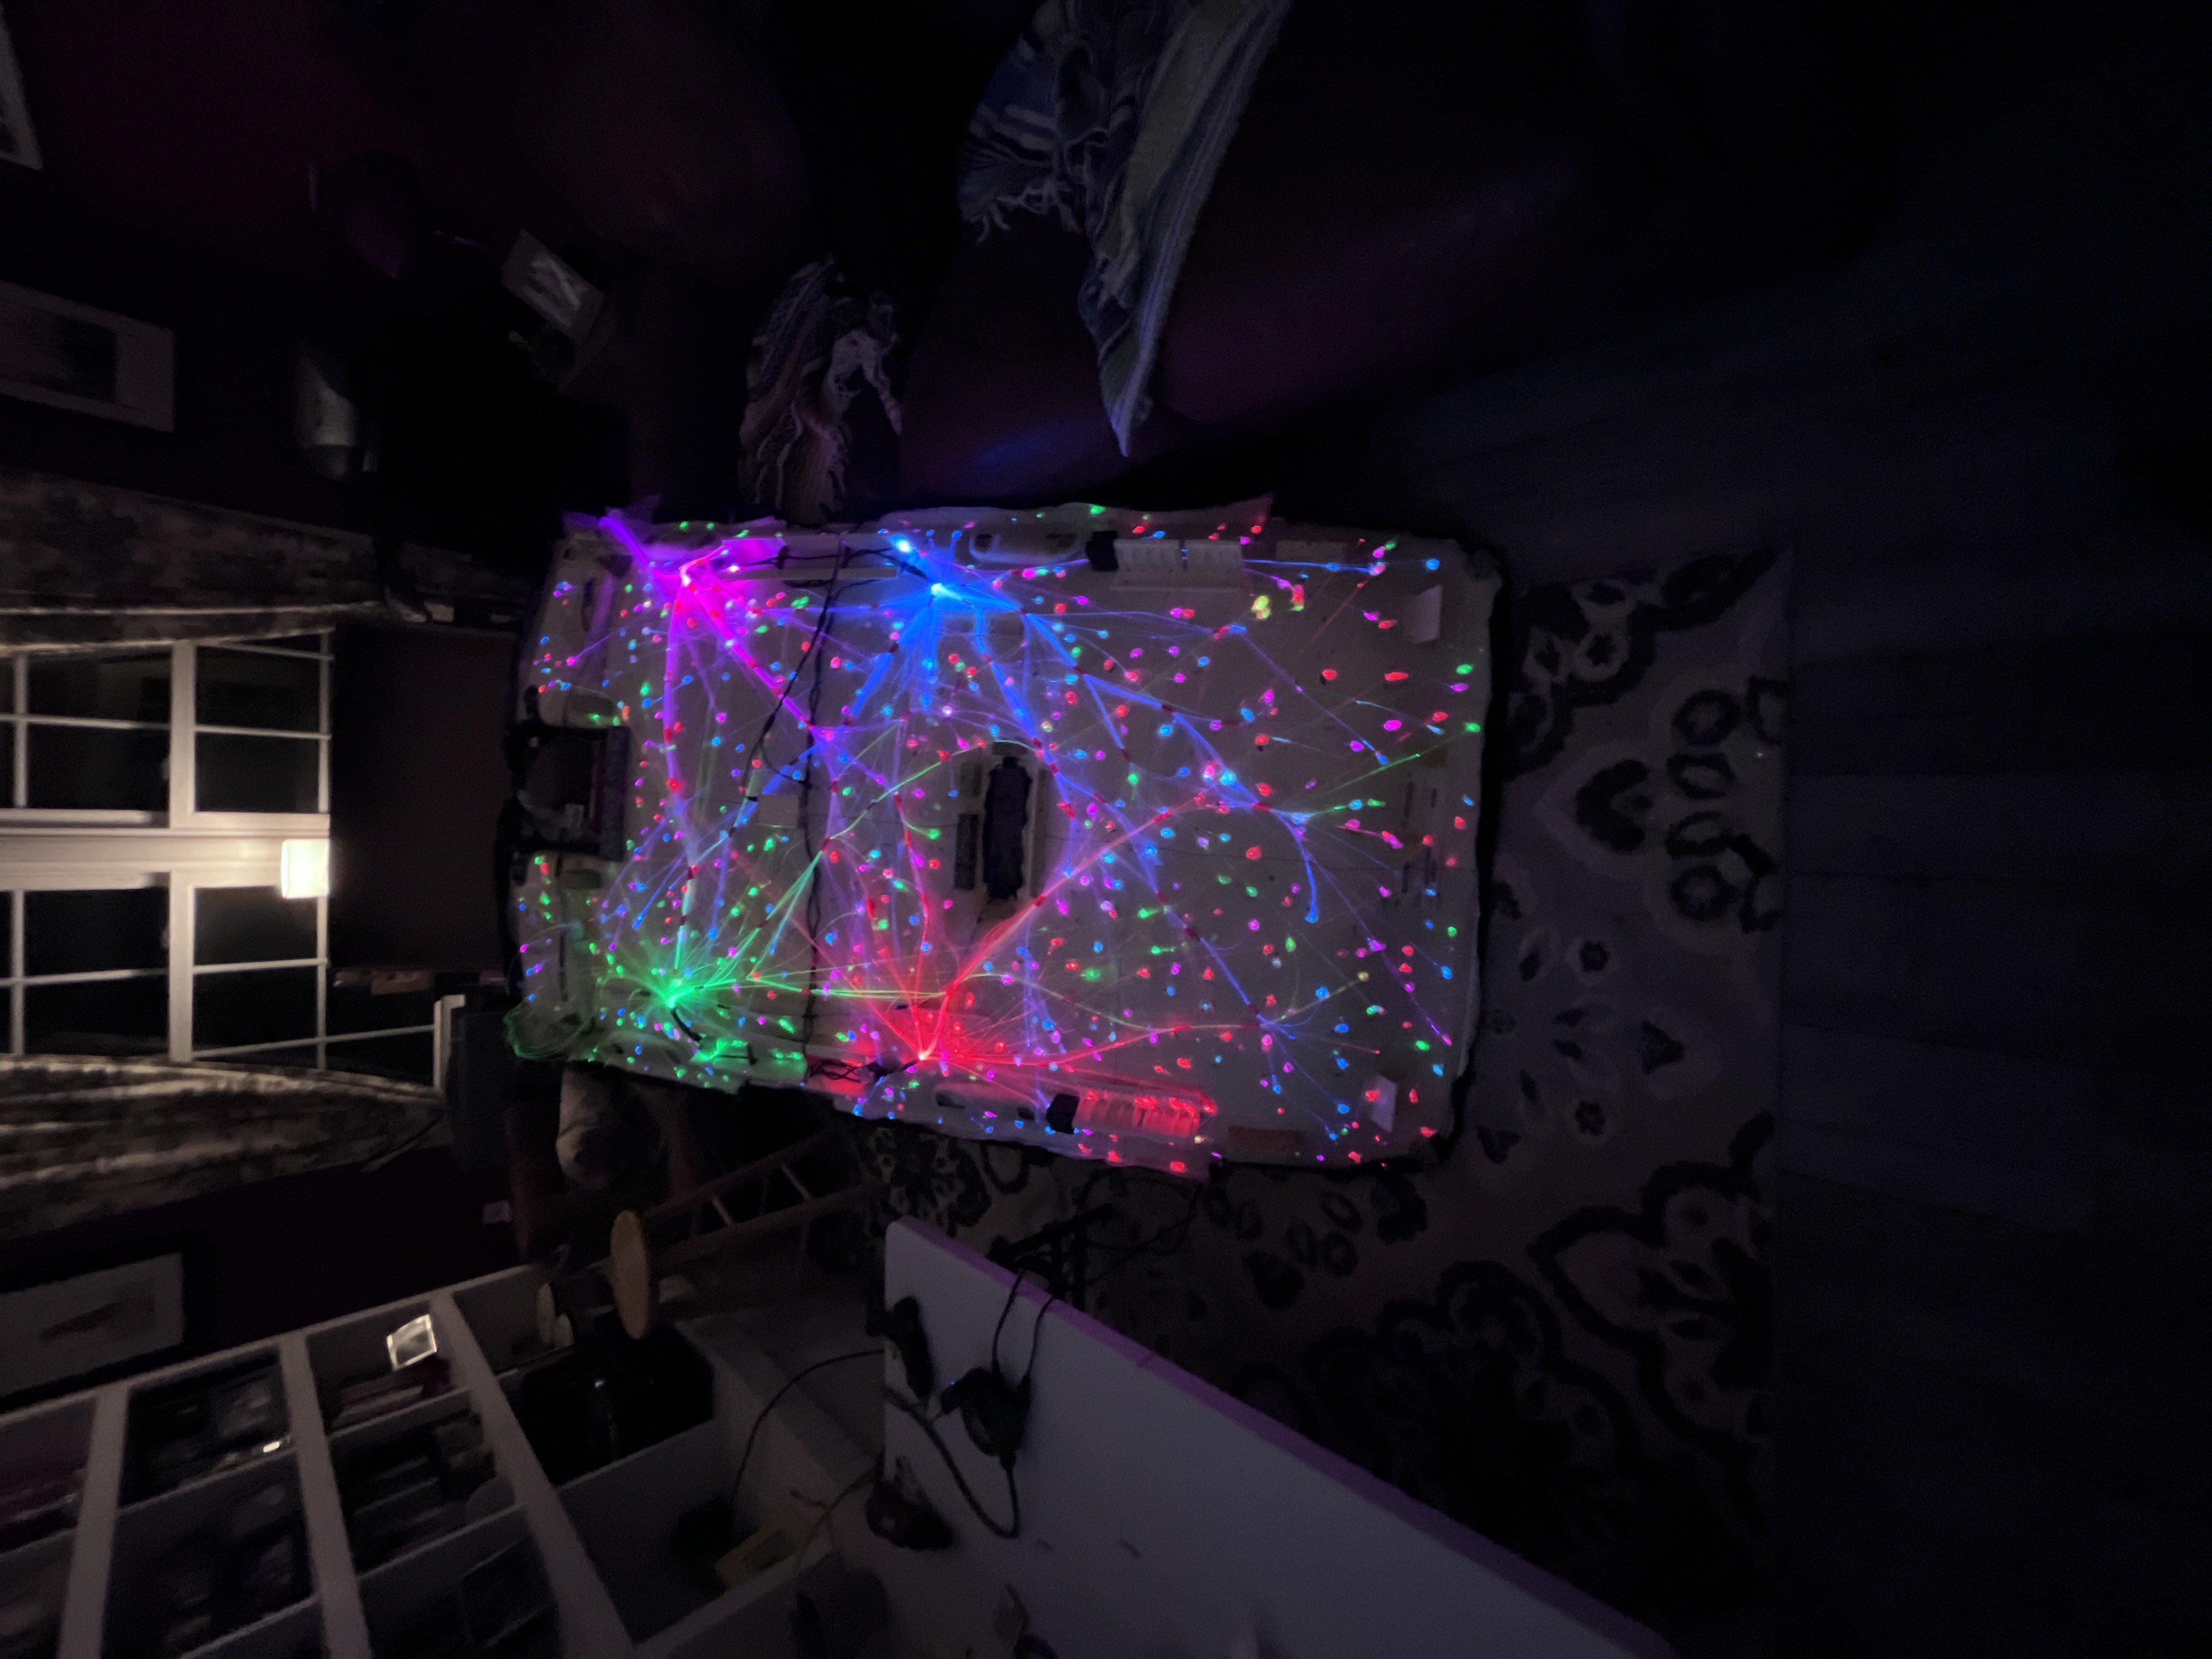
Advanced Design & Fiber Routing
For those using multi-bundle kits with 2–4 bundles (projectors), consider creating fiber zones:
- Split your headliner into equal sections and assign each bundle to a specific zone.
- Match each zone with a unique color (e.g., blue, white, purple) for a visually appealing effect.
- This method is particularly useful for creating multi-color galaxy-style layouts or branding shapes/logos.
- For custom logos (e.g., Porsche crest, OEM+), map your design on cardboard or tape, then drill holes through a stencil for precision.
- Carefully route fibers to avoid overlaps or pinching, especially near edge corners and grab handle brackets.
Kit Type Matters – Choose Wisely
Selecting the right starlight kit is crucial for achieving the desired effect:
OEM+ Split Power Box Kits (used by OEMPlusNJ):
- Feature a power box with **4 color-separated mini projectors**.
- All projectors and fibers can be housed inside the headliner, allowing for a clean installation.
- Only one power wire exits the liner, making the install super clean and ideal for multi-zone setups, custom logos, and shooting stars.
Standard Large Projector Kits (common Amazon/eBay type):
- Typically have a single large projector that must be hidden in the trunk or behind trim.
- Fiber bundles route up the C-pillars and into the headliner, which can be more tedious to install.
- These kits are often cheaper and widely available but can make it harder to do logos or zones unless manually separated.
Shooting Star Add-ons:
- Add dynamic animation to the starlight effect with burst fibers.
- Requires separate wiring and a control module for operation.
Recommended Tools & Supplies:
- Drill + **1.0–1.5mm bits** or hot needle tool
- Hot glue gun (with clear glue sticks) or silicone adhesive
- Painter’s tape or stencil material for logo layouts
- Wire strippers, crimpers, and connectors
- Multimeter for testing 12V source
- Foam board or cardboard to mock up your design beforehand
Installation Tips:
- Lay out all your fiber first and divide them equally between bundles to ensure even distribution.
- Randomize your layout by slightly shifting the pattern if sections look too uniform.
- Keep drill holes to a minimum to avoid cracking the foam backing of the headliner.
- Always leave slack in the fiber tails when routing to avoid tension that could damage the fibers.
- If gluing inside the headliner, avoid excess glue to prevent it from pressing through to the fabric side.
Projector & Power Box Placement
For compact kits like the OEMPlusNJ kits, you can hide the projector inside the headliner. Otherwise, route the projector to the trunk, behind the glove box, or under the seat. Use the 12V fuse box or cigarette lighter as your power source for a clean installation.
Final Thoughts:
When choosing a starlight kit, consider the projector size, fiber count, and desired layout complexity. Kits can range from 200 to 1500 stars, so match the fiber count to the size of your vehicle. Multi-color projectors offer better customization options, allowing you to create a unique ambiance. Always test your setup before the final installation to ensure everything works as intended!